Mocking Service walkthrough
With the recent release of the RAML Mocking Service I took a couple of minutes to try it out and put together this walkthrough. I hope you find this useful. What is it? A service capable of reacting to http requests by returning the correct responses based on your RAML configuration (it will be a no brainer to use this if you follow the example on this thread). How can I access and use it? It’s already integrated with the API Portal and working directly as part of the API Designer’s Console. Show me the code! Hold your horses, first a quick “project” description. Let suppose you are trying to write the API for some e-commerce product catalog. Now, let’s focus on the “Product” resource, which will have an Id, Name and Price. That’s it. Let’s create the API that will allow us to retrieve the list of products and to create a new one. Let’s start by writing a minimal and valid RAML file, and add the resource and a first empty response.
#%RAML 0.8
title: Product Catalog API
version: 1.0

/products:
  displayName: Catalog of Products
  get:
    responses:
      200:
Check the API Console at the right side of the screen, and you will see the “/products” resource and the “GET” verb there (nothing new so far).

As shown in the image, the Mocking Service switch is off. Let’s turn this feature on. First thing to notice: The baseUri was automatically inserted into the RAML file

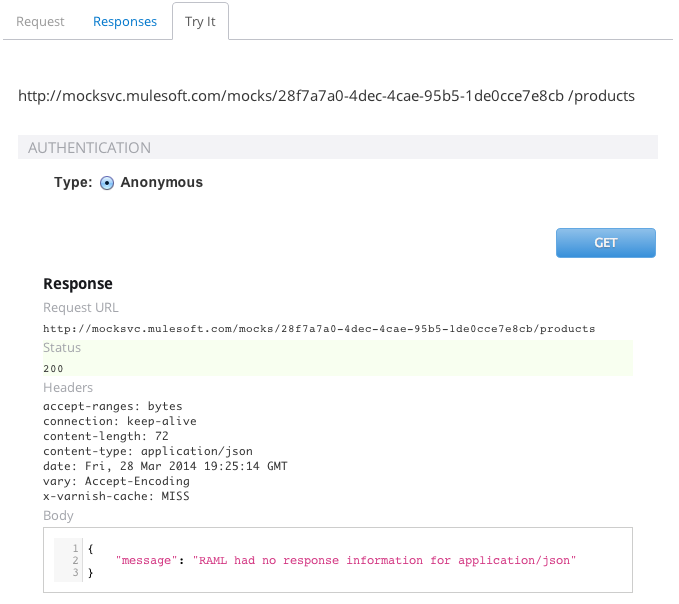
This is the real URL of the mocked API, which means that the Mocking Service actually created a basic implementation of your API and exposed a real service based on it. I’ll show most of the steps on this tutorial on the console, but you can also use any client (I recommend Postman or its chrome extension, but you can also run a simple curl on your terminal) to test it. When turning the Mocking Service on, API Designer is making the mock public to be consumed from any client. Another important thing to note (or remember) is that this RAML file doesn’t contain any complete responses yet. So let’s try to see what happens when trying to call a resource method. On the Console at the right of the screen, unfold the “/products” resource, and move to “Try it” tab.  As you can see, even with an empty response, the Mocking Service is responding with a Status 200 and the body:
 { "message": "RAML had no response information for application/json" } Understanding that the Mocking Service will always try to resolve on a “best-effort mode” is important to get one of its “coolest” features. Let’s move forward and complete the first response by adding the body and an example. This should be how the resulting RAML file looks:
#%RAML 0.8
title: Product Catalog API
version: 1.0

/products:
  displayName: Catalog of Products
  get:
    responses:
      200:
        body:
          application/json:
            example: |
              {
                "id": 10,
                "name": "Diet Coke",
                "price": 5
              },
              {
                "id": 11,
                "name": "Diet Sprite",
                "price": 3
              },
              {
                "id": 12,
                "name": "Diet Fanta",
                "price": 3
              }
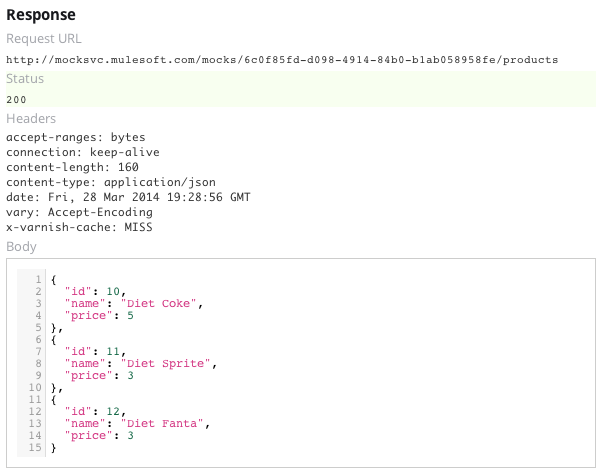
Now go once again to the API Console at the right of the screen and hit “GET” again. As you can see, the response is now returning the list of products defined in the example in the RAML file.

Reminder: Always remember that you can invoke these methods from any client (I’ll even show an example later).
QueryParams & validations
Let’s see how the Mocking Service behaves when we start defining parameters for the requests. Add the query parameter apiKey and make it required. It’s of type string, which is the default, so you don’t need to explicitly say it. RAML has pretty sensible conventions. The resulting RAML file is:
#%RAML 0.8
title: Product Catalog API
version: 1.0

/products:
  displayName: Catalog of Products
  get:
    queryParameters:
      apiKey:
        required: true
    responses:
      200:
        body:
          application/json:
            example: |
              {
                "id": 10,
                "name": "Diet Coke",
                "price": 5
              },
              {
                "id": 11,
                "name": "Diet Sprite",
                "price": 3
              },
              {
                "id": 12,
                "name": "Diet Fanta",
                "price": 3
              }
 Let’s hit “GET” with an empty apiKey and check what happens.
  As it’s shown on the screenshot, the response status is 400 (http for bad request) and the error message specifies that the “query parameter apiKey is required” (as we defined on the RAML file). You can now type any string for the
 apiKey parameter and “GET” will retrieve the list again. Data Type validation Let’s remove the query parameter to replace it for itemsCount. Make it required and of type integer. It would be a typical paging scenario. The resulting RAML should look like the following one:
#%RAML 0.8
title: Product Catalog API
version: 1.0

/products:
  displayName: Catalog of Products
  get:
    queryParameters:
      itemsCount:
        required: false
        type: integer
    responses:
      200:
        body:
          application/json:
            example: |
             {
                "id": 10,
                "name": "Diet Coke",
                "price": 5
              },
              {
                "id": 11,
                "name": "Diet Sprite",
                "price": 3
              },
              {
                "id": 12,
                "name": "Diet Fanta",
                "price": 3
              }
Now, since the parameter is not required, not passing it in will result in the same response (the Products list). But let’s check what happens when the data-type is incorrect (remember that we defined this one as integer). Let’s fill in the itemsCount parameter with the value “four” and hit “GET”.  Schema Validations Validating a more complex input by using Schema Validations could be a little bit more challenging than the QueryParams, but not rocket science either. Just create the
 post verb with an example and a schema for a product. The resulting RAML file should looks like this:
#%RAML 0.8
title: Product Catalog API
version: 1.0

/products:
  displayName: Catalog of Products
  get:
    queryParameters:
      itemsCount:
        required: false
        type: integer
    responses:
      200:
        body:
          application/json:
            example: |
              {
                "id": 10,
                "name": "Diet Coke",
                "price": 5
              },
              {
                "id": 11,
                "name": "Diet Sprite",
                "price": 3
              },
              {
                "id": 12,
                "name": "Diet Fanta",
                "price": 3
              }
  post:
    body:
      application/json:
        example: |
          {
            "name": "Coke",
            "price": 4
          }
        schema: |
          {
            "type":"object",
            "$schema": "http://json-schema.org/draft-03/schema",
            "id": "http://jsonschema.net",
            "required":false,
            "properties":{
              "name": {
                "type":"string",
                "id": "http://jsonschema.net/itemName",
                "required":true
              },
              "price": {
                "type":"number",
                "id": "http://jsonschema.net/itemPrice",
                "required":false
              }
            }
          }
    responses:
      200:
        body:
          application/json:
            example: |
              {
                "id": 100,
                "name": "Coke",
                "price": 4
              }
Go to the API Console at the right of the screen and look for the “POST” verb (you might want to collapse GET to see it clearer).  As you can see in the image, the Request tab shows the Schema and Example entered in the RAML file. Let’s switch to the “Try it” tab and run the following tests:
- Post with an empty body
 Status 400 (Bad Request) and a fairly descriptive error message. The Post is expecting valid JSON.
- POST a “correct product” (you might want to use “Prefill with example” option and post it, or change the data).
 HTTP Status 200 is indicating that the POST was correct (of course, since it’s mocked, no real functionality is attached to all these calls).
- You can try now passing a string to the price.
 Once again, status 400: Bad Request, and the message indicating that the “price” parameter is not a number. Mocks available to any client As I said before, you can invoke your mocked API from any client (and you might want to repeat all the steps from there by copying the baseUri/[resource]/…..), I will only show the get here to demonstrate this.

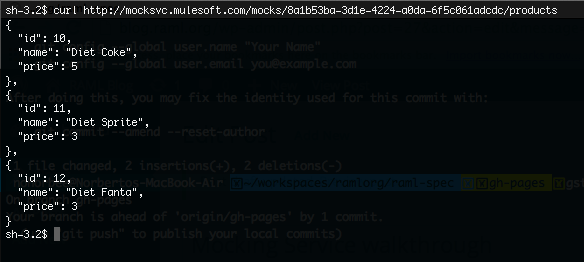
As I (also) said before, I’m using Postman chrome extension, but you can use your favorite tool. For example, “curl” from your terminal:

Please, feel free to give your feedback here or contact me directly. Cheers!